For 6 September
Read Menkman, “Glitch Studies Manifesto ” (you can find the reading on this website) or click here.
Assignment: For 11 September
Take one of your own photos and make at least three glitched versions using a Hex Editor. Choose the best three to present to the class.
Take one of your own photos and make at least three glitched versions using Audacity (remember to first convert the file to a .bmp if it is not already). Choose the best three to present to the class.
THESE IMAGES ARE DUE AT 11:59pm 10 SEPTEMBER
AND
Take notes about what you did for each process and be prepared to discuss in class.
For Mac computers you can download Hex Fiend here, and Audacity here.
For PC’s check your operating system version and look here for a hex editor and here for Audacity.
AND
Read Nicolas Collins Chapters 1-8 and 10
READ ON FOR HOW 2s…
How to glitch with a hex editor:
open your Hex editor (these instructions are specific to Hex Fiend but if you are using a PC the instructions should be very similar)
go to File/Open File
go to Edit/Mode/Overwrite Mode (if it is not already in this mode)
go to Edit/Find/Find (this will open a search bar in the top of the Hex Fiend editor)
with your cursor, go into the body of the code below and select a section. hint: make sure that you are not editing any of the header (look in the right column of data, where the “gibberish” looks more regular –that should be far enough into the body of the file to not irreparably damage it.)
in the find window, type in a value to find and then below the find window, type in a value with which to replace it. hint: experiment with different searches and combinations of searches until you find a way of searching that you like, and that produces results that you like. And, if you are really, really, really into base 16 numbers, check out this tutorial: https://learn.sparkfun.com/tutorials/hexadecimal
repeat this action many times throughout the file, or try to “replace all”
when satisfied (or exhausted) go to File/Save As and save your file somewhere you can find it
open your file and see if you like it.
AND
How to glitch with Audacity Glitch BMP with Audacity
AND
How to convert .jpg to .bmp
One simple way is to find a computer with Photoshop on it. Open your .jpg in Photoshop then Save As a .bmp. (all the computers in our class room have photoshop and most computers in the library have photoshop.) File/Save As; in the window that opens, under format select BMP then hit save.
OR
you can search “convert jpg to bmp” in your favorite search engine (perhaps you like Bing, or Netscape (professor laughs at his own joke)) for online file converters. I don’t like using these—therefore I am not going to recommend a particular one—but they can work in a pinch.
Assignment For Tuesday 18 September
Build one contact mic using the technique I demonstrated in class. Be prepared to show me your working contact mic in class on Tuesday.
All of the parts and tools you need to build your contact mic are now in the IM lab (029). On Sunday, we will have batteries for the small amplifiers so you can test your mics.
Add a 1/4″ plug (the type I showed you in class) in order to receive full points for this assignment.
Good luck!
Assignment For Thursday 20 September
Using a solderless breadboard, recreate the condenser microphone circuit that I demonstrated how to build in class on Tuesday. I will check to see if it is working in class (for points). And make sure you clean up after yourself in the lab!
Assignment for Tuesday 25 September
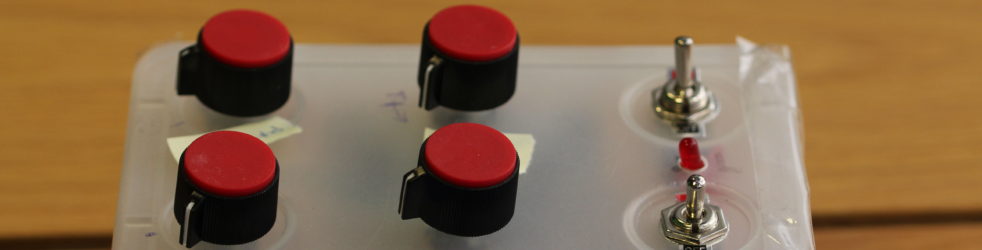
Using a solderless breadboard, recreate the cracklebox circuit that I demonstrated for you in last class. Look on the schematics page for the circuit diagram. You will also find there a photo of the breadboarded circuit and the pinout diagram for the LM386-3 IC.
ALSO for Tuesday, please bring in an enclosure that you think you would like to place your working circuit inside. When choosing your enclosure, please also consider the usability of the device that you are designing and how you want people to interact with/use it. And, as we discussed in class, you may want to add caontact points (to which you wire your “loose wires) to have a more “neat” looking interface. That said, loose wires are fine. It’s all in how you want the interface to work.
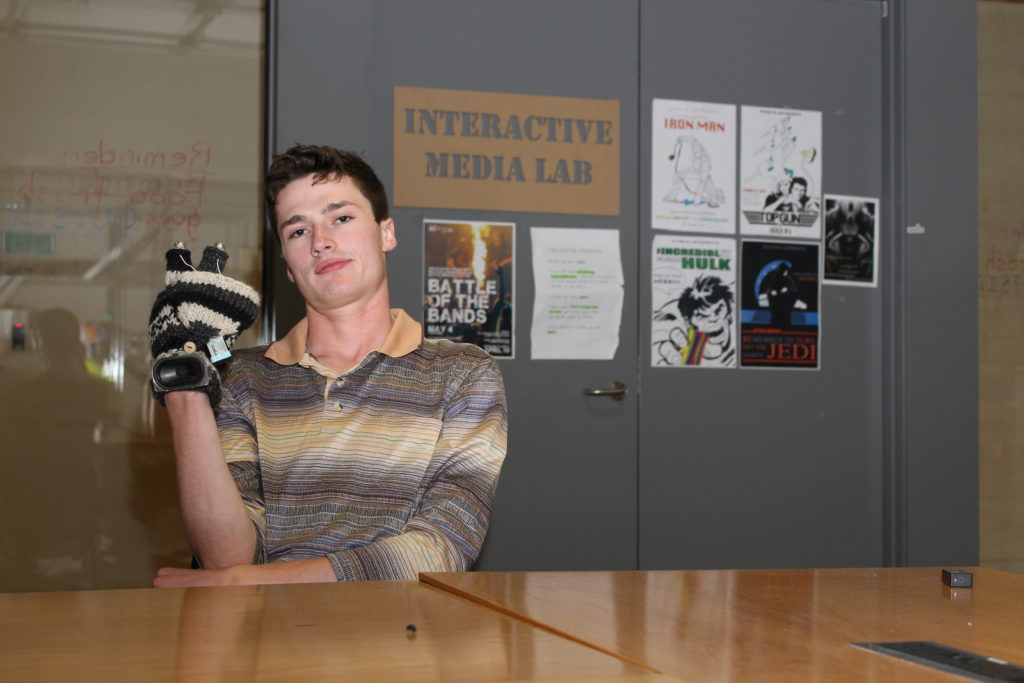
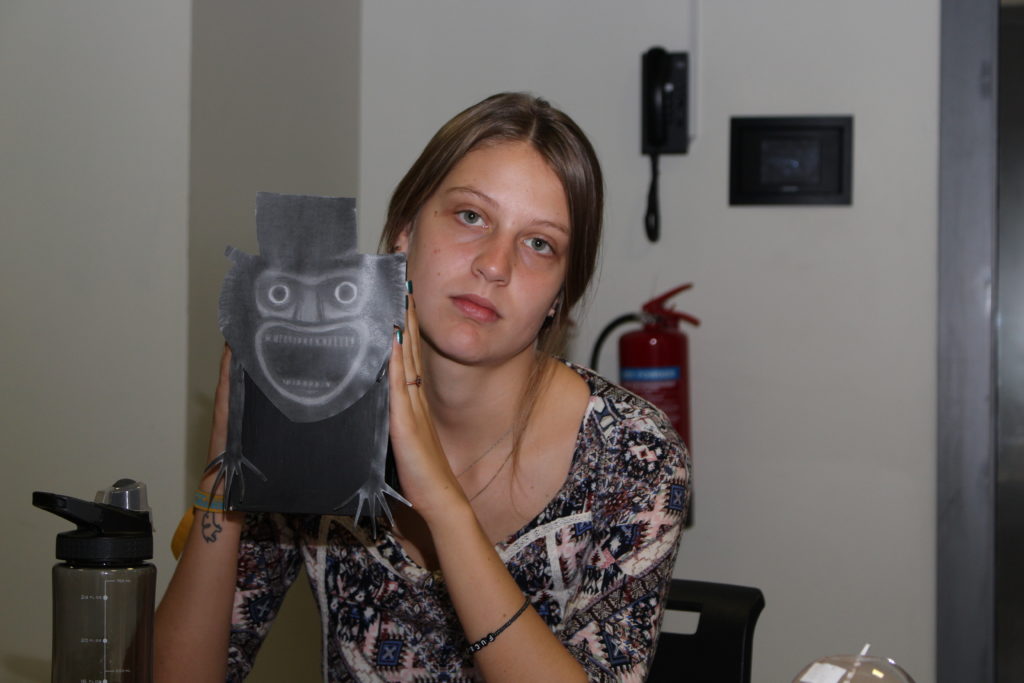
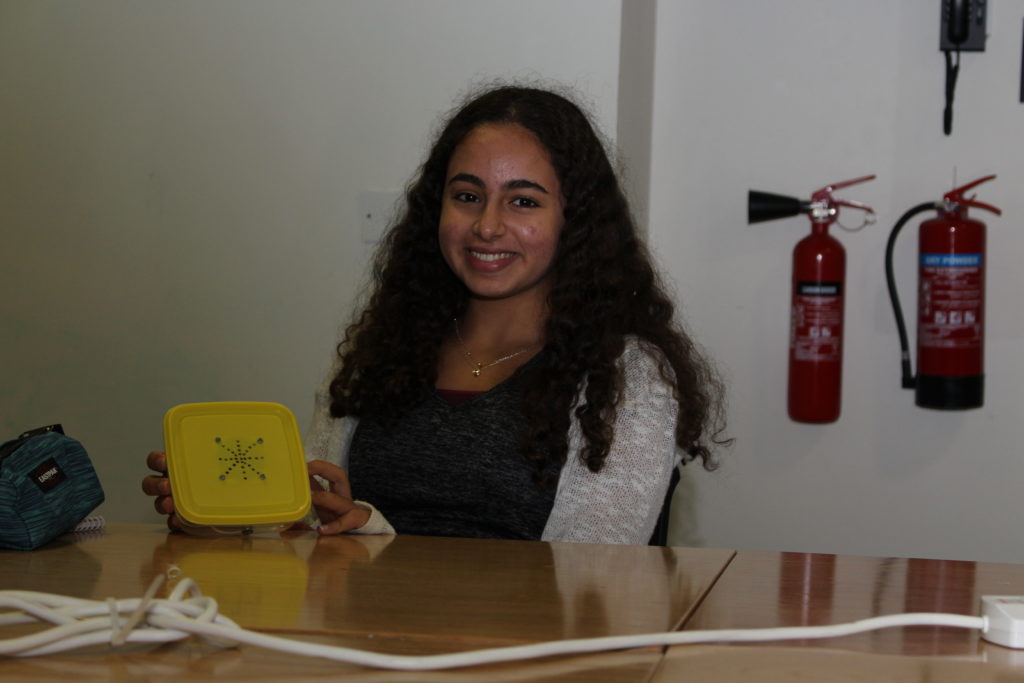
Here are some images and video of sample projects:
A chocolate box, a puppet, a monster box, a good ol’ sandwich box and a plastic pencil case + Craclkebox Parade!


ASSIGNMENT FOR 27 SEPTEMBER
Keep working on your crackleboxes
AND
READ Collins Chapter 11 and Chapter 14
AND
READ Electronics Monk Chapter 2 (link to chapter is on our additional readings page). One note about this chapter: it is geared toward an Arduino type kit, but once you get past the first page of the reading, the components are all relevant to us.
AND
As part of your participation grade, I may randomly ask a question of you about the readings, so be ready. 🙂
ASSIGNMENT FOR 4 OCTOBER
ENCLOSED AND WORKING CRACKLEBOX CRITIQUE
ASSIGNMENT FOR 9 OCTOBER
Take a look at our schematics page. Find the Atari Punk Console (APC) schematic read through it and the notes I have left for you. Pull all the parts together you will need to begin breadboarding and come to class prepared to breadboard this circuit in class. We will talk about the APC on Tuesday and you will have time to work on the project in class.
ALSO on the schematics page, take a look at the Audio Output Transformer amplifier circuit and pull together the parts for this circuit (don’t worry if you are not sure which component is the audio output transformer on our parts cart — I will point these out to you in class and show you how to orient them in the circuit).
AND on our additional readings page, find the Engineer’s Mini-Notebook. Take a look through it to get a sense of what all the 555/556 timer chip is capable of. The version of the circuit we are making (the APC) is called the stepped-tone generator in this Forest Mims classic.
AND FINALLY be prepared to tell me who Hans Camenzind and Forest Mims are. It might be a gameshow moment!
MIDTERM ASSIGNMENT — DUE THURSDAY 18 OCTOBER
For the midterm assignment you will present the following:
- One working and cleverly enclosed Atari Punk Console circuit. DO NOT use the speaker portion of the schematic for this project. Please use the 1/4″ jack mono output option instead.
- One working and cleverly enclosed Audio Output Transformer/Amplifier circuit, again with a 1/4″ mono jack output (into which you will plug a contact microphone for demonstration as a functioning (and noiseless) speaker).
- AND, documentation of all of your major projects to date. Specifically 3-4 images and one short video (no more than 30 seconds) of each of the following projects: Cracklebox, Atari Punk Console, Audio Output Transformer/Amp. Please send these to me as attachments to email, or via Wetransfer.
You will be graded as follows:
- Does the circuit work properly? (see the Collins Lab video, the one I showed in class, to understand how basically the circuit should sound)
- Does your enclosure function well for the type of circuit that it encloses in other words, does the design seem to be well-thought through? How does it look and function together? Usability?
- Did you modify the basics? To what end?
Tuesday’s class will be an open work session and Thursday we will do the critique.
Let me know if you have questions!
J
FOR TUESDAY 30 OCTOBER
Read Collins Chapters 15-19. We will discuss the highlights and begin breadboarding variations of the circuits found in chapter 18.
FOR THURSDAY 1 NOV
Li-chen
Maria
Nico
Simran
Mai
Mimi
Let me know!